


How to Create PPI Address Labels
Address Labels. Particularly Royal Mail PPI Address Labels.
Not the sexiest topic in the world.
But, producing address labels quickly and efficiently is vital when your online business starts to take off. After all, who wants to be writing labels out by hand or double-keying address data?
We know from the feedback we’ve had from our customers, both via our Roadmap voting process, and shared directly with our Account Management and Support Teams, that you wanted to be able to produce these automatically from Khaos Control Cloud.
We also know that you need us to be able to support multiple label formats.
And your own PPI image.
So that’s what we’ve done.
In the Shipping stage of the Despatch | Sales Invoice Manager screen, Print Address Label has been added as an ‘Action’.
Green-select the invoices you want to print address labels for and then click into Action à Print Address Labels.
This will bring up the new Label Options dialog. We have two default ‘Matrix’ options (think Avery Labels) and a Custom Option. If you’re printing to a Zebra or other single-label per sheet device – rather than using the office printer – then you’ll want to go Custom.
Setting up a Custom Label format for your business falls into three elements:
- Label Sizing – here you’ll define:
- The width and height of your label
- The margins of your label
- Printing Options – which allow you to set:
- Page orientation – i.e. portrait or landscape
- Page size – if you’re printing a label per page this may be the same as your label size
- Page margins – again, these could be familiar if you’ve only got one label per page.
- Printing Method – define whether you are printing single labels or sheets
- Show Postage Stamp – defines whether or not to print your PPI image
- Show Returns Address – pulls through your company address from System Values
- Royal Mail PPI – allows you to upload and store your PPI image against the label.
All the way through, the preview element on the right of the dialog will allow you to understand the impact your changes are having.
Once you’re happy, click ‘Print’ and we’ll generate a PDF of your labels for you to download and print out locally.
The Matrix options make this process even quicker, as you only have to select your sizing and define your PPI image. We handle the rest.
So, what are you going to do with all that time you’ve saved?
How to Create and Maintain Packs and Builds for Stock Items
Standing out from the crowd is harder than ever these days. The UK ‘does’ ecommerce and multichannel retail better than any other country in the world. That means that, as a retailer, you don’t need to worry about educating your audience on how to buy or engage with you. But it does mean that if you’re going to grow your retail empire, you’re going to have to earn the sales you need from the competition.
Adding value to your products is a great way to stand out from the herd and to improve customer loyalty. There are any number of ways that you can approach that and two excellent ones are using Packs and Builds for your stock items.
Packs – Why bother?
Packs allow you to bundle / group together a number of items into a pack, which you can then promote. Packs allow you to increase order values and profitability whilst also bringing value to your customers.
But trying to keep track of packs manually is painful. You need your Cloud ERP to be able to manage your pack stock levels and pricing for you, without you having to worry about it. If you sell 10 packs, you need your systems to know what that means in terms of components and whether you’re going to be able to fulfil those packs straight away.
Delivering a consistent customer-experience with packs can also be challenging. You need your customer-facing paperwork to reflect the fact that the customer has ordered a pack, rather than a collection of individuals products. And you’ll want pricing and other financial elements on invoices to display correctly.
Our Mobile ERP’s Pack functionality covers all of this and more.
Packs – Setup
Setting up a new Pack is done within the Stock Item | Relationships screen:
- Load up (or create) the item that’s going to represent the Pack (we call this the Pack Header).
Important Note – these instructions assume that your Pack Header is not stock controlled. - Click into ‘Edit’ mode
- Click on the ‘Relationship Type’ drop-down and set this to ‘Move With’.
Important Note – once you start adding items to a relationship you can’t change this value, so best to set it first. - Click ‘Add’
- Use the stock lookup to green-select the first item that will be in the pack and then click ‘Select items’ at the top of the dialog.
- Confirm the quantity of this item that you want to include in each pack.
- Repeat the ‘Add’ step until you have all of the items you require in your relationship.
- Click ‘Save Stock Item’.
For more information on amending quantities, stock controlled and non-stock controlled pack headers, removing elements from a pack and much more besides, please refer to our in-app help.
Packs – Using them to Provide Value
Pack Header stock items provide you with the ability to set special prices and promotions against them, via tools such as:
- KeyCodes
- Price Lists
- Special Offers
Packs also feed into your order entry and processing, making your pick / pack / despatch process for packs as efficient as possible.
Builds – Why would I need a Bill of Materials?
Build relationships in Khaos Control Cloud enable you to build and maintain Bill or Material-type relationships. They are most commonly used where a business wants to be able to display and sell a finished product to their customers.
Setting up a build, enables you to control and manage the component products that go into creating the finished product.
Build relationships don’t just allow you to manage your stock levels. They also allow you to control how the stock value of your finished Build Header should be calculated, by enabling you to set Value Proportions for each of the items that are included within the Build Relationship.
Builds – Setup
The initial process for setting up a Build mirrors that we ran through above for Packs. The only key difference, is that a Build Header stock item will always be Stock Controlled. So, to create a new Build Relationship:
- Load up (or create) the item that’s going to represent the finished product (we call this the Build Header or Parent).
- Click into ‘Edit’ mode
- Click on the ‘Relationship Type’ drop-down and set this to ‘Build’.
Important Note – once you start adding items to a relationship you can’t change this value, so best to set it first. - Click ‘Add’
- Use the stock lookup to green-select the first item that will be in the pack and then click ‘Select items’ at the top of the dialog.
- Confirm the quantity of this item that you want to include in each build.
- Repeat the ‘Add’ step until you have all of the items you require in your relationship.
- Click ‘Save Stock Item’.
Once you’ve got your relationship defined for the Build, you may want to use the ‘Value Prop’ and ‘Qty’ tools to amend the relationship:
Value Prop – This button will allow you to define the Value Proportion % for the element in the Build Relationship that you’re currently focused on. Defining this figure for each element of your build relationship means that we can then accurately define the stock value of the Build Parent whenever you build another finished product. As we will take the current stock value of each component, combine that with the quantity and the value proportion and update the stock value for the Build Parent accordingly.
Qty – this tool enables you to amend the quantity of the currently focused item in the relationship.
Builds – Building and Unbuilding Finished Product
The ‘Build’ and ‘Unbuild’ tools enable you to just that.
When you’re ready to build a bill of materials:
- Load the Build Parent into the Stock Item screen and click into the Relationships tab
- Click into ‘Edit’ mode
- Click ‘Build’
- Enter the quantity of items you want to build
- Click ‘Continue’
- Click ‘Save Stock Item’. Khaos Control Cloud will have built the number of items requested and updated your stock levels. Both for the Build Parent and for the child items.
Should you ever need to unbuild an item, so that it’s components are available for use independently – or in another relationship – then follow the process above, using the ‘Unbuild’ function, instead of ‘Build’.
Swipe action added to show allocations on mobile devices
Staying on top of your debtors and finances on the move has now been made even more intuitive, with the swipe action added to the Company | Statement screen on mobile devices.
With a flick of your wrist you can move from a customer’s Invoices and / or Payments and view the associated allocations, helping you to keep your business running whilst you’re on the go.
Added Extended Record Panel Captions on Mobile Devices
We’ve taken our brilliant feature for extending grids – the Record Panel – and have pimped it! We know that it isn’t possible for our grids to show all of the detailed information that some items contain on a mobile display. Let alone allow you to edit that data from your phone.
So we’ve revisited the record panel:
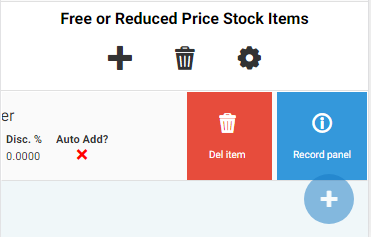
Swipe right on a grid item – this example is from the items grid on a KeyCode – and you can click into the ‘Record Panel’. That displays a pop-over on your mobile device which allows you to review and edit all of the available data for the grid item. With the captions now providing as much information as on desktop, viewing and editing grid data on mobile has never been more powerful.
The swipe option is a really useful feature on a number of grids, including Confirm Shipment, Statements (as we’ve seen above) and elsewhere. Let us know what you think about the way we’ve extended it!
It’s just another example of us putting the ‘Mobile’ into Mobile ERP.
Drilling into a Lead and Entering Comments & Actions
We’ve improved the way in which you can drill into individual leads and follow them up within the CRM | Leads screen. Double-clicking on an entry in the Leads grid will open that lead’s comm log as a pop-over dialog. Making it even quicker for you to drill into an individual lead and understand what has happened with them to this point, what’s due to happen next and plan for future activity with them.
With that in mind, we have also changed the Leads screen so that you can immediately edit leads from the new popover dialog without having to click into Edit mode. This allows you to amend existing data and add new comments and follow-up actions against your leads quickly and efficiently.
Fixes
As well as delivering the above changes – and getting the groundwork in place for the next major release – the team have fixed a number of errors, including:
- Now possible to access the Sales Invoice Manager on tablets.
- Creating a new channel no longer causes the Move Up / Down and Lookup Buttons to stop responding.
- Swiping on grids from mobile devices now working as expected.
- Export CSV grid option now works with Internet Explorer v11 and Microsoft Edge browsers.
- Now possible to enter values on existing KeyCode Promotions.