

In previous posts, we’ve shown you tips and tricks on how to get started on Shopify, how to use your admin panel and how to boost your sales. Now we want to go further and provide you with a step by step guide on how to build a Shopify Store in 2020, all from scratch.
Find the right theme for your Shopify Store
After you’ve signed up with Shopify, it’s time to set up your Shopify store.
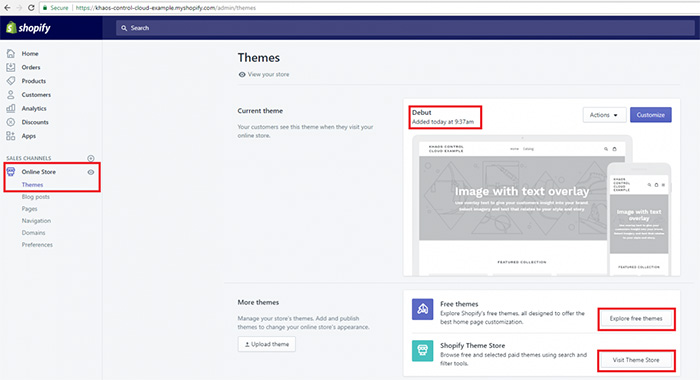
To do so, go to the Online Store tab on the left-hand navigation menu of your admin panel. From there, you can see, edit and replace your current theme. Visit the Theme Store or explore free themes if you would like to change it.
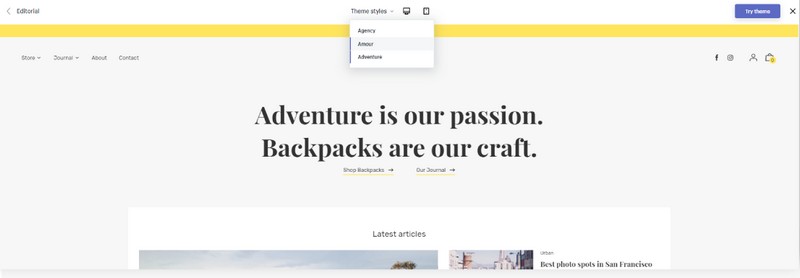
When browsing through available themes, there’s a few things to keep in mind. Theme prices vary significantly – from free themes to prices up to several hundred pounds. Consider your budget and what you want from a good theme. Use the filters on top of the page to show relevant themes for your industry.

Make sure the theme fits with your overall branding strategy and works well for the products you’re selling. It can be helpful to view a demo before you install a theme to help you decide.
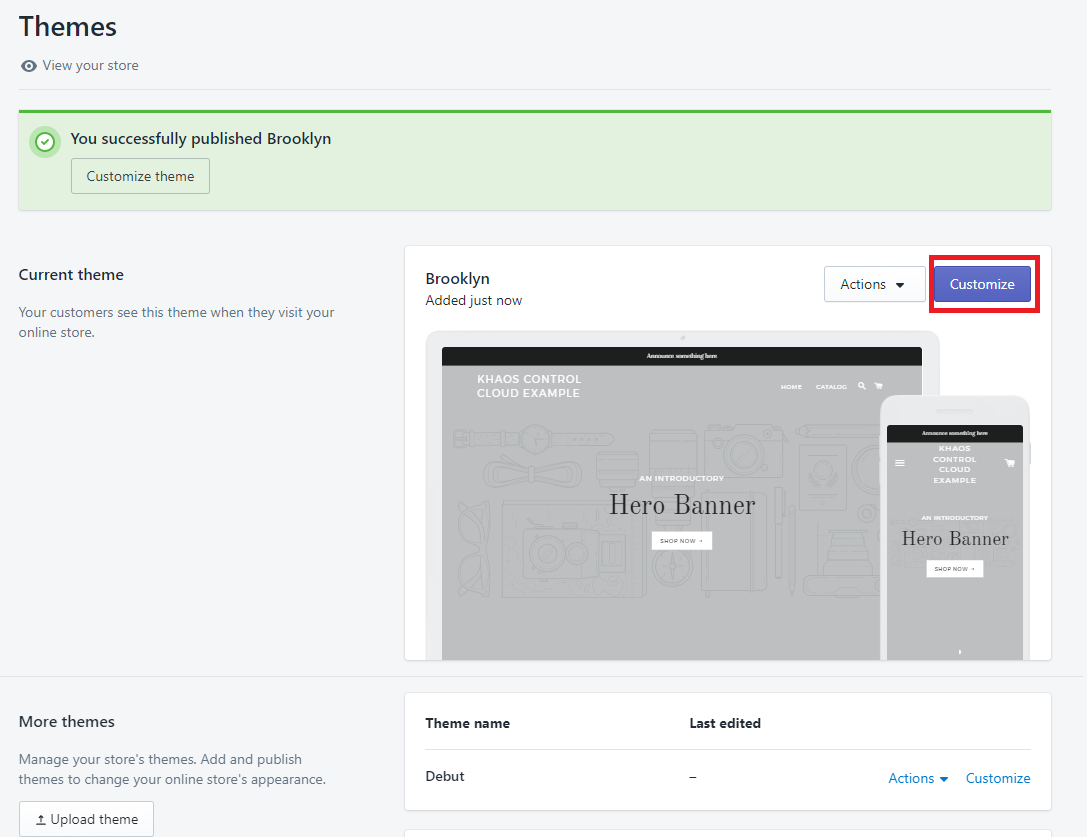
If you’ve found the right theme for your Shopify store, click ‘Install theme’ and then ‘Publish as my store’s theme’ if you want to use it immediately.
You will then be re-directed to your Shopify admin, from where you can customise the theme to be the ideal fit for your Shopify store.
Go to the store editor to start customising your store.
Customise your Shopify Store front
The store editor is the perfect place to embrace your creativity. Without the need for any coding skills, you can easily build the Shopify store of your dreams. The editor is very intuitive and user-friendly.
Take some time to have a play and explore all the wide range of possibilities by yourself, watch various tutorials on Youtube or get help from a professional Shopify developer.
Within the store editor, you can add your logo, engaging hero images, powerful call-to-actions, links to your social media pages and newsletter sign-ups. You can also change colours, fonts, and layout to fit with your branding and corporate identity.
When building your store, keep in mind our tips for selling with Shopify like a boss, optimising your images, and getting SEO right.
Add products
After you’ve created the frame for your Shopify Store, it is time to fill it with life. You can upload and manage your products from your admin panel.

Physical products can be added manually, in bulk from CSV files or imported from other platforms. To upload digital products or services, you will need a special app. You can find more info on that in Shopify’s online manual.
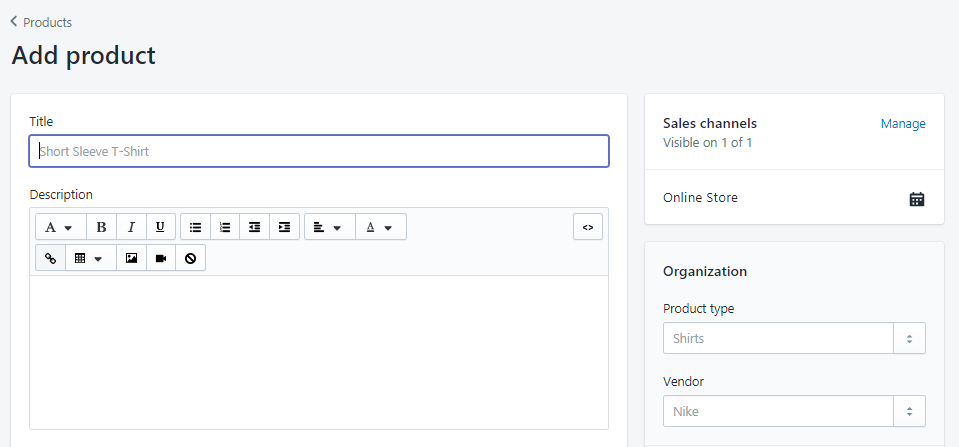
To add products manually, simply click ‘Add a product’ and then enter all the relevant information, like title, description, prices etc.
Make sure you add as much information as possible and use several high-quality images to make the purchasing decision easier for your future customers. In most cases, it makes sense to ensure the images are all the same size, which gives your product pages a clean look.
You can also edit shipping details, product variants and product SEO from this page.
Add a blog
Having a blog on your ecommerce website is a great way to ensure you constantly deliver fresh content, which has a positive effect on your SEO performance.
It can also help you to tell your customers the stories behind your products or your company, show them ways how to use their purchased items in the best way or provide them with other useful content.
From your Shopify admin, you can easily add blog posts to your site. Click on ‘Online Store’ and then ‘Blog posts’ in the navigation menu.
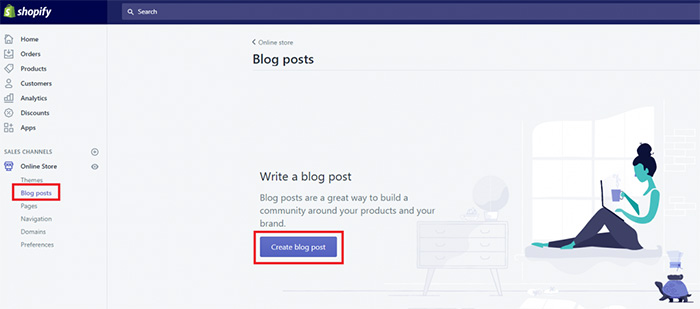
And then it’s time to get creative again. You can add pictures and videos to your blog, give it a meaningful title and set a featured image. Also, make sure you add an excerpt and optimise the post for search engines on the bottom of the page.
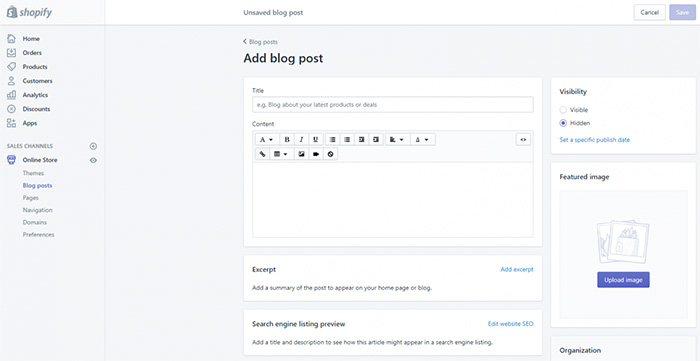
Once you’re happy with the post, you can either publish it immediately by switching the visibility from ‘Hidden’ to ‘Visible’, or publish it later by setting a specific publish date.
Add social media buttons
Being active on social media is an absolute must for every business. It is a great and cost-effective way to build your brand, strengthen existing customer relationships and acquire new customers.
You can easily point your website visitors to your social media channels by adding the relevant buttons to your store. This is possible from the general settings tab in your theme editor.

When choosing your social media channels, make sure you focus on those that are most relevant for your target group. You can also add a sharing option to your Shopify store to allow the visitors to share your product on social media.
Optimise your settings
Before you set you Shopify store live and start selling, it is worth going through your store settings to make sure it is all set up correctly.
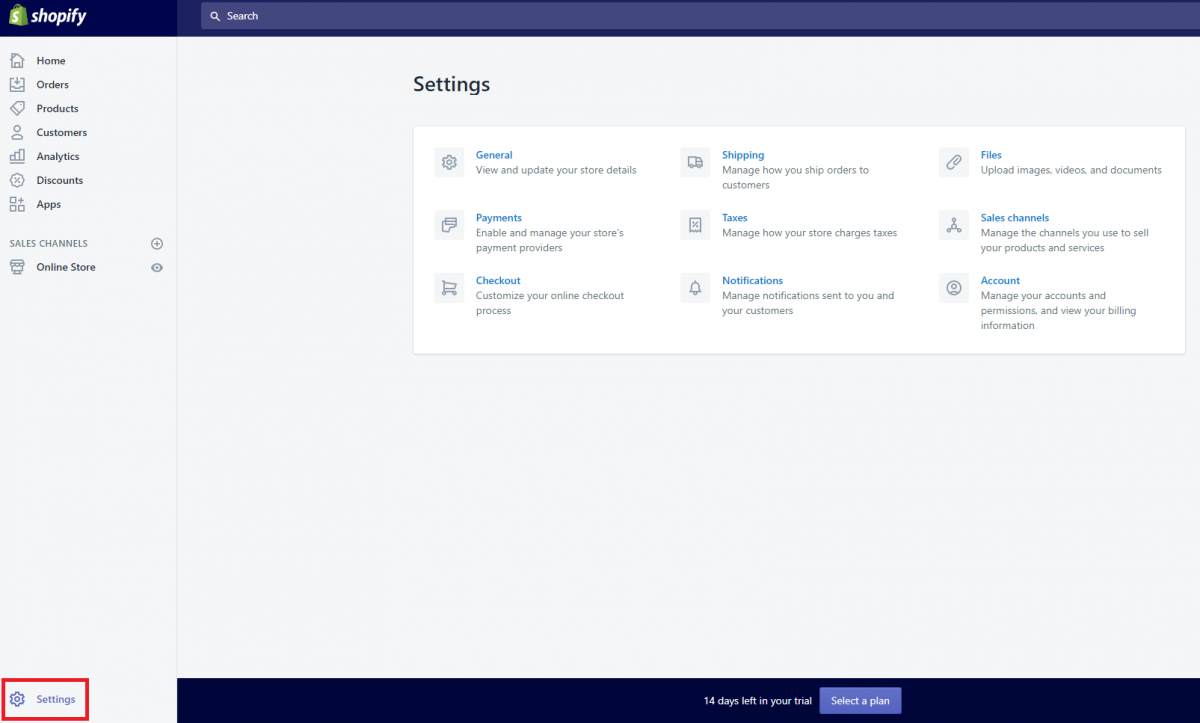
From there, you can set up payments, customise the checkout process, optimise shipping options, manage your store taxes and more.
Once you have created your perfect online store, filled it up with amazing products and optimised your settings, it is time to set your store live. And then there’s nothing that can stop you from growing your successful online business.
And that, is how to build a Shopify Store.